Friday, March 25, 2011

Hooked.

Rachel billed her Bottled Rainbows as a leisurely quilt-along, but I don't know...these blocks are pretty addictive!

First Four Rainbow blocks
I've finished four, and I had plenty of scraps for these. Some of the other colors are going to be more difficult (I'm looking at you, purple). Going through my scraps is telling me a lot about my fabric buying habits. Pretty lopsided!

Light Blue Rainbow
I probably could've made a dozen of these light blue blocks. I squeezed in a little Sanctuary selvedge on this one.

Pink Rainbow
Pretty in pink.

Light Orange Rainbow
I have more orange fabric than I would've guessed.

Dark Orange Rainbow
This is my favorite one so far. I was able to incorporate some of my favorite fabrics in this one (Arcadia, I hardly knew ye!).

Up next: Yellow. But first, I'm going to start cutting my fabric for Lee's quilt-along. Cause what's better than one quilt-along? Two quilt-alongs! (Fact.)

Tuesday, March 22, 2011

Quick fix

We have a coat/broom/etc. closet in the hall, and the door broke, leaving this less-than-attractive site:
IMG_2963

This weekend, I finally got around to sewing a fabric fix.

IMG_2967
Super easy, and it adds a bit of color to my otherwise drab hallway.

IMG_2971
I used this pretty Tudor print in Spice from Ty Pennington's fabric collection (I'm pleasantly surprised by his line of fabrics. Anyone else?). The rust color is a pretty close match to the walls in my kitchen, which adjoins this hall.

IMG_2968
I took the lazy way out here. I bought a "no tools" curtain rod, which works like a tension rod but seems a little sturdier because it has little grippy things (technical term) that go on the inside of the door frame. I also used these drapery clips instead of sewing a sleeve in the fabric. I'm not sure how durable it will be, but it works for now! And I'm glad that I can easily remove it for washing if when it gets full of dust and dog hair.

Monday, March 21, 2011

Adventures in paper piecing

March Bee Block

I finished up my March block for our Sew Beautiful Bee. Elizabeth requested spiderweb blocks using Anna Maria Horner fabric. What's not to love?

I'm linking up to Sew Modern Monday at Megan's blog. Head over there to check out some awesome projects!

{Sew} Modern Monday at Canoe Ridge Creations

Saturday, March 19, 2011

This post is brought to you by the letter F.

One of my friends is having a baby boy soon, and I just finished up this quilt for them.

All Star

I was excited to find out that I had enough Riley Blake All Star fabric left over from this quilt to make another baby boy quilt. I used this tutorial on Sew Mama Sew for a Charm Squares baby quilt. Quick and easy. I added some Kona Orange and Grass Green. I debated with myself over the sashing. I thought about orange or green. I considered white too, but that seemed impractical. In the end, I settled on this dark brown. I was afraid it might be too drab for a baby quilt, but in the end I think it looks pretty cool.

IMG_2952
I went with the robotic/blocky quilting again. I think I'm getting a little better at it. The binding is Kona Grass too.

I had a tough time settling on a plan for the back. I really wanted this to be a 100% stash quilt, but I didn't have enough yardage of any one color of solid for the backing.

IMG_2959
So...after some advanced math...I came up with this!

IMG_2955
Luckily the boy's name starts with F and not, say, Q. This little boy is joining a family who has an appreciation for the orange and blue combination, and I had just enough of each to make this work. I need to get this in the mail! I hope it is well-loved.

Thursday, March 17, 2011

Supernova!

Supernova Quilt-Along with Freshly Pieced

I'm so excited Lee decided to do a quilt-along for her Supernova quilt.


I've been drooling over her Hope Valley version for a long time, so I couldn't pass this up.

Central Park
I'm thinking this might be a good excuse to unwrap my Central Park bundle. Some of the larger-scale prints might not work, so I might have to focus on the smaller prints. What do you think?

There's still time to join in! Head to Lee's blog for details.

Monday, March 7, 2011

Twins!

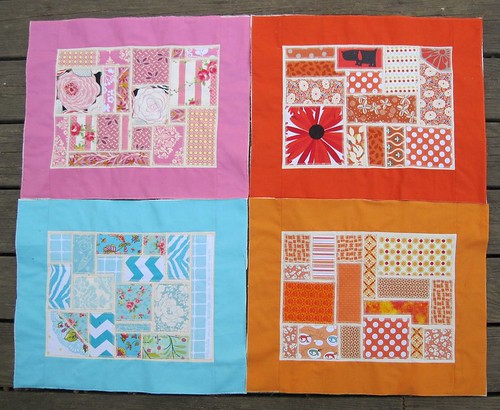
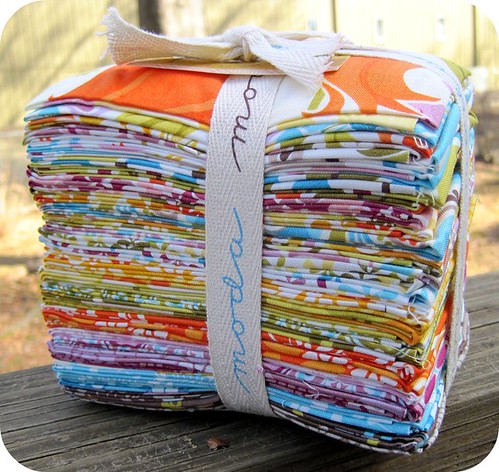
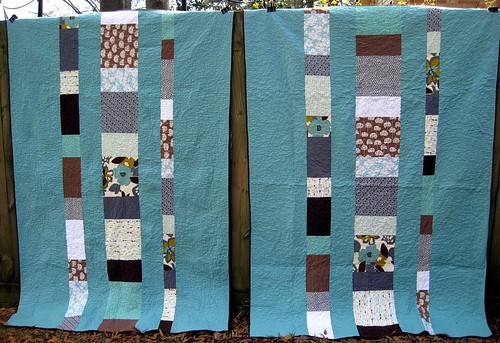
My mom wanted some new twin-size quilts for her guest room, so she decided to give quilting a try. She got as far as piecing the the long strips of printed fabric before she decided quilting wasn't for her. So I stepped in to pick up where she left off.

TwinsBoth
The pattern is based off of the 12+2=Q pattern from Oh Fransson, but we adapted the pattern to make two twin quilts instead.

Twin1
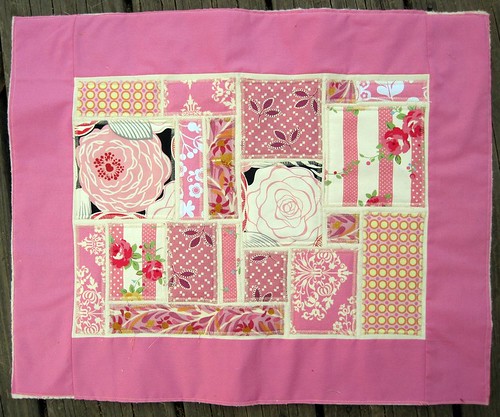
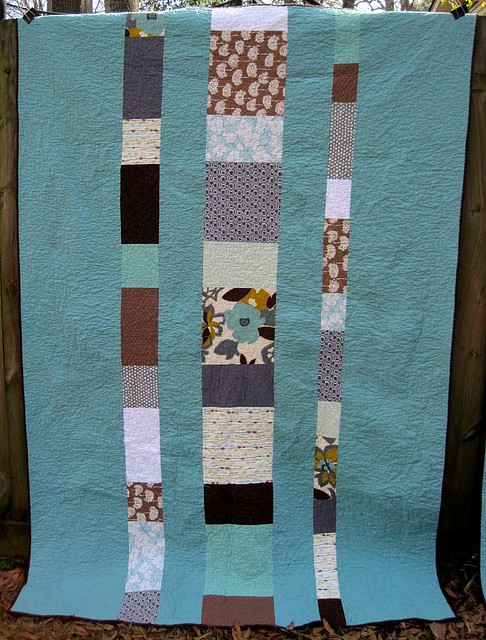
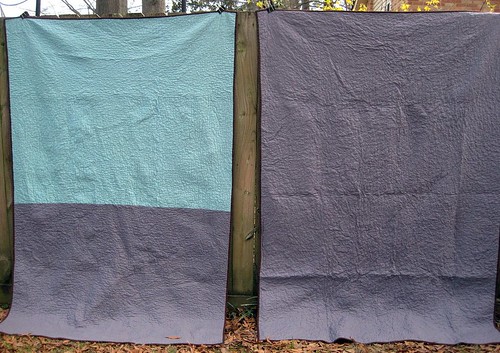
Here's twin #1. I started quilting this right after finishing my Sanctuary quilt, so I was a little bored with stippling. Plus, I thought the large expanses of solid colors could use something a little more interesting. For Twin #1 I decided to do loopy quilting.

LoopyTwin
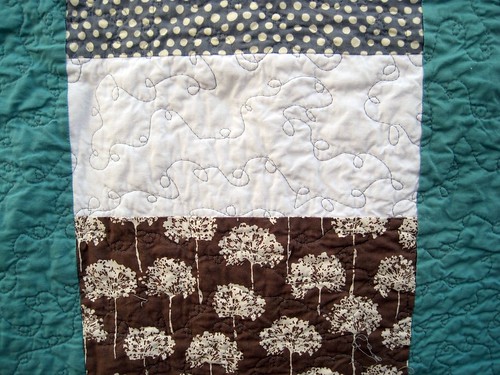
I couldn't decide if the loopy quilting was a cool contrast to this modern design, or if it was just discordant. Luckily I had Twin #2 to try something different!
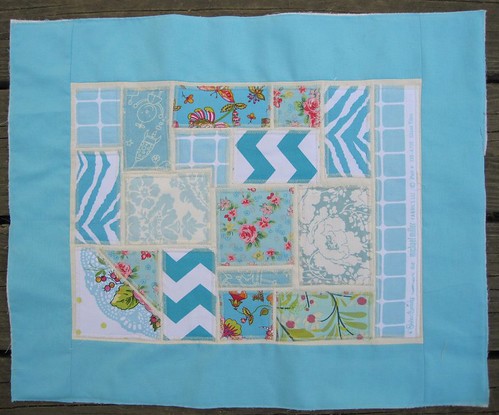
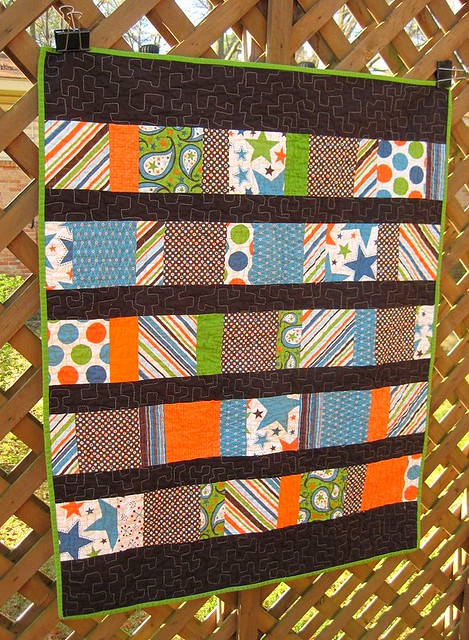
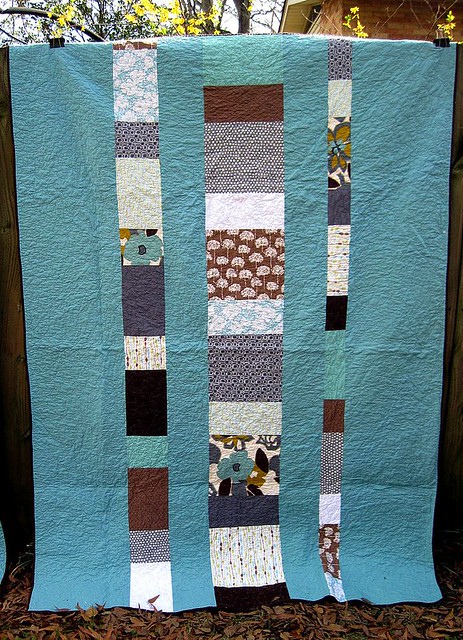
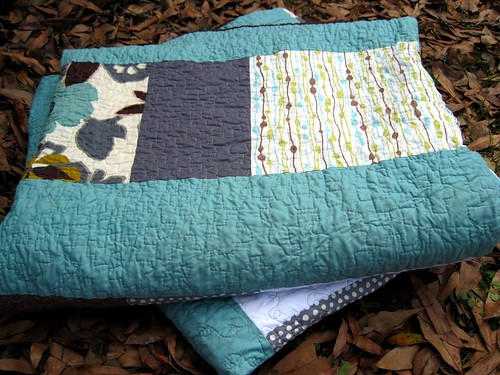
Twin2
Here's #2.

RobotQuiltingClose
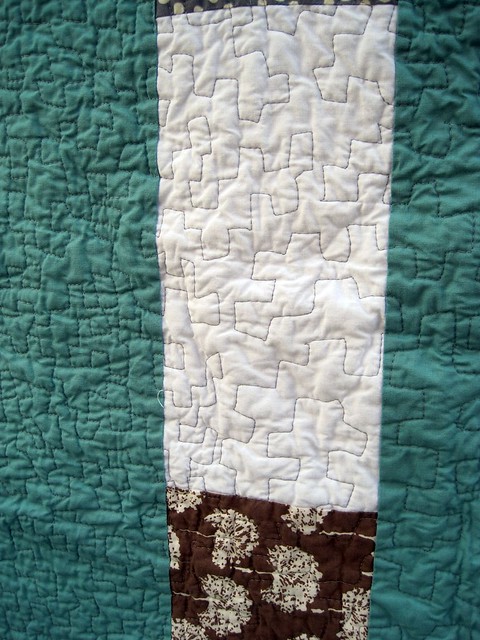
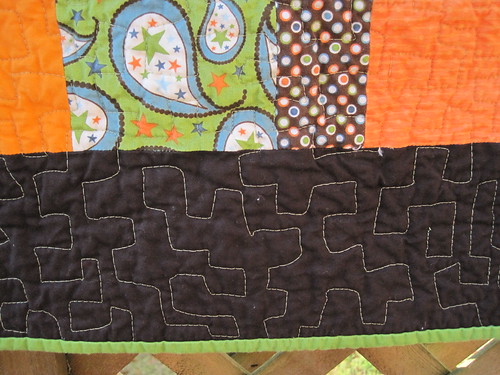
For this one, I tried the robotic, boxy meandering stitch (tutorial from Oh Fransson here). It took me a long time to feel comfortable doing this! It feels very awkward. At first, I got caught up trying to make each angle 90 degrees (not gonna happen), and my stitch length is all over the place. Up close, it looks pretty wonky, but I like the overall effect.

TwinsBack
The backs were both supposed to be Kona Coal, but I bogarted some of my mom's Coal to make my Sanctuary quilt. So I Frankensteined creatively pieced the back with some Kona Sage left over from the front. (What? She's my mom. She's obligated to love me anyway.)

TwinCLose
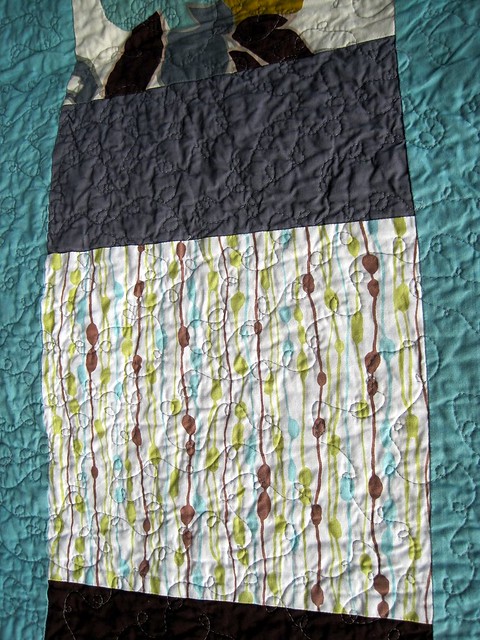
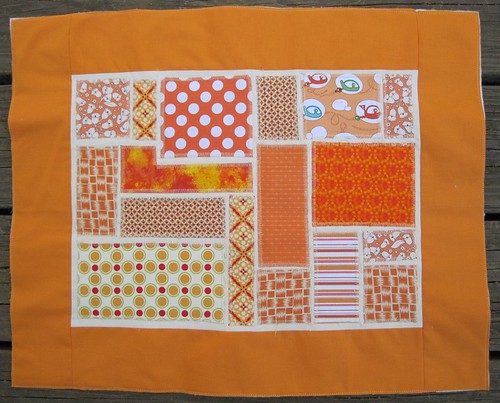
My mom bought the printed fabrics as a custom bundle from Fabric Worm so I don't really know what any of them are, but I like them!

TwinClose
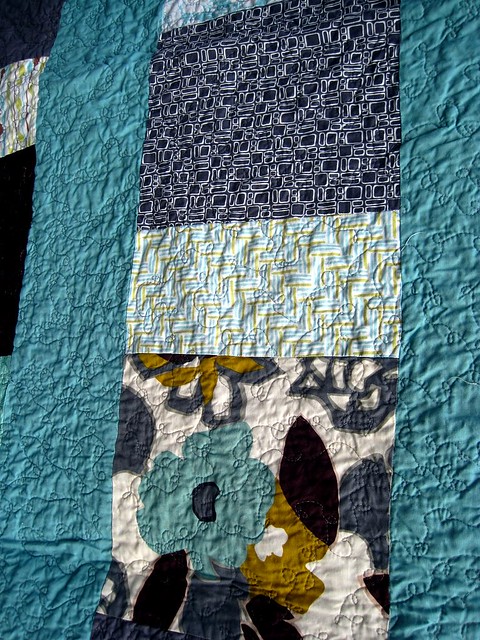
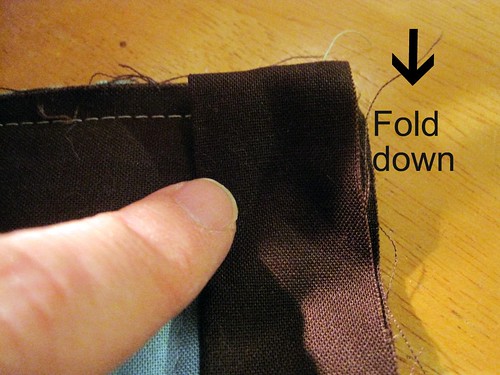
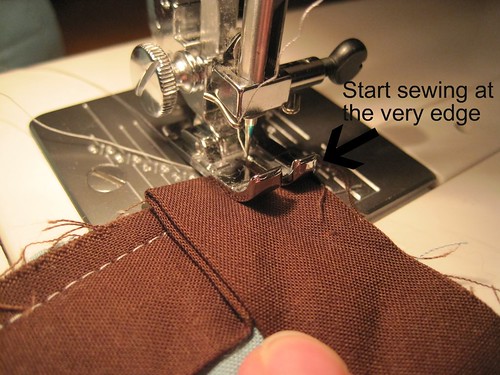
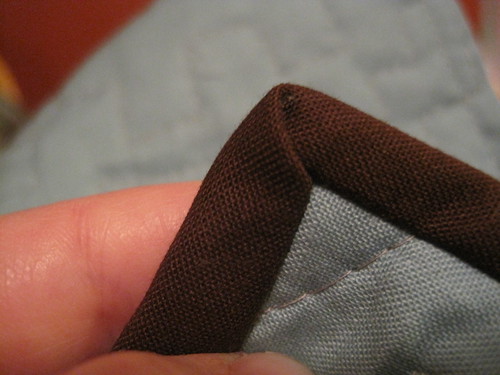
The solids are Kona Coal and Kona Sage (I think we've established that this is a great color but a bad name). The binding is dark brown.

TwinsStacked
I'm happy with they way these turned out, but after these and my Sanctuary quilt, I'm ready for something in a different color palette! And also smaller!


{Sew} Modern Monday at Canoe Ridge Creations
I'm linking up to Sew Modern Monday on Megan's blog!

Friday, March 4, 2011

Blades for less

Have you seen this tip? I read about it on KarrieLyne's blog and had to check it out.

Harbor Freight sells replacement blades for carpet cutters for $1.79/pair. The blades fit in my 45 mm Olfa rotary cutter. (I've heard they fit other brands too.)


I picked up three packs, so that's less than $6 for 6 blades. I think regular price at Jo-Ann's is $6.99 for one blade. Quite the deal!

Before you place an order online (shipping was going to be $6.99), be sure to check the store locator. Surprise! There was a location just a few miles from my house--right on the way to Sonic so I could hit happy hour for a ginormous Diet Coke afterward.

I tried out the cheap blades today, and they seem to work very well. I'll need to test them out longer to be sure, but I'm pretty sure my days of buying their more expensive counterparts are over!

Thursday, March 3, 2011

Mitered corners

A few months ago I was complaining that I was having trouble making a decent mitered corner on my binding. This method works for me every time. If you're having trouble, you might give it a try.

Corner
When trimming your quilt sandwich, take extra care to make sure your corner is perfectly square.
This is probably the most important step and the one I was slacking off on.


miter1
I use 2 1/4-inch strips for my binding, and I sew them to my quilt sandwich using a 1/4-inch seam.

Sew until you're 1/4 inch from the corner of your quilt sandwich. Backstitch. Remove your work from the machine, and cut the thread.

(You'll notice that I don't use pins when I sew my binding. I like to have the freedom to adjust the fabric as I go. Also, I'm very, very lazy.)

Miter2
Take the loose end of your binding strip and fold it up, so it's perpendicular to the side you just sewed.

Miter3
Fold the strip back down, being careful to line up the fold with the side you just finished and the loose end with the side you're about to sew.

Miter4
Start sewing the new edge, again with a 1/4-inch seam allowance. This time, begin sewing all the way at the edge of your work. Backstitch before you continue on your merry way.

IMG_2890
With a little luck, you'll end up with a neat little corner!

Tuesday, March 1, 2011

A little AMH at work

I was searching Etsy for a new mousepad for work and came across this...


That's right, it's a Good Folks mousepad! It arrived yesterday and it brightens up my desk quite nicely. There are a few fabric mousepad sellers on Etsy, but I got mine here. She has lots of other fabric designers too (there are some cool ones using Soul Blossoms that caught my eye). Of course, I'm trying to figure out how she made it...